
WordPress plugins are a great tool in the hands of web development services providers to make it easier to add features and functionalities to a WordPress website. The huge plugin directory that the platform has contains every plugin you will ever need for adding a feature to your website. There are even plugins that allow creating a dedicated e-commerce store over WordPress websites. And just in case you are not able to find a plugin that you need, you can always use custom WordPress development and customize a plugin as per your requirements.
With that vast a variety, WordPress has not failed to offer plugins even for a staging website that is much needed by the web development services providers for the testing, monitoring, and maintenance of business websites.

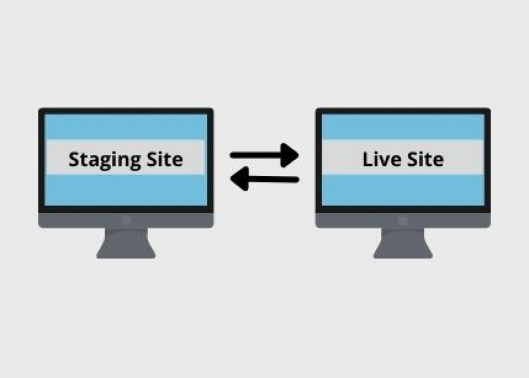
What is a WordPress Staging Website?
A staging website, also known as a testing website or a WordPress development website is a separate website that you create for the purpose of testing and monitoring your live website. It is an exact copy of the original website with a minor difference that unlike the live website, this website is not available to the public. It is an offline version, and you can conveniently work on it even without internet access.
Such a website makes it convenient to test the changes without interrupting the live website. Such testing is important because if you make a change to the live website without testing it, you are putting yourself at the risks of crashing of the website because you do not know how the change will work out. Also, a WordPress development site makes it possible to monitor the live website for bugs and errors and troubleshoot them as and when they occur. Such proper and efficient management of the website aids in giving out good user experiences that is much required for the success of the website.
With this brief about what a WordPress Staging site is, let us move on to how can plugins help create such a staging website.
Basically, WordPress has a number of plugins available for the creation of a staging site. Some of the most popular plugins are StageCoach, All-in-One WP Migration, and WP Staging. All these plugins offer for extremely easy creation of a WordPress development website in just a few simple steps.
- Creating a Staging Site Using StageCoach
This plugin can give you a staging website in a matter of minutes. It is a single click process, and you shall be done with the creation of a staging site in two easy steps.
Step 1: Install the plugin from the plugin directory of the WordPress platform.
Step 2: Go to the staging site wizard by clicking on the plugin from the admin panel, enter the name of URL in the wizard, and then click on “Ride the Staging Site.”
And it is done. In a few minutes, you will see an option on the screen stating, “Go to Staging Site.” As soon as you click on it, it will ask you the username and password. Enter the same username and password that you use for your live website. You shall be logged in, and you can start working on the staging website for tests and monitoring and other developments.
- Creating a Staging Site Using WP Staging
This is another two-step staging website creation plugin making the task extremely convenient for you without needing you to put in many efforts.
Step 1: Install the plugin, click on it from the admin dashboard, and in the resultant wizard, click on “Create New Staging Website.”
Step 2: Enter the URL, make sure to allow copying of the database, and then click on “Start Cloning.”
The plugin will create a duplicate of your live website in no time, offering you a lot of help and convenience with your work on the website regarding testing and maintenance.
[contact-form-7 id=”1261″ title=”single blog form”]- Creating a Staging Site Using All-in-One WP Migration
This could be a pretty lengthy and time-consuming process since it requires exporting and importing of files and databases between the live website and staging website. Here are the steps that you have to follow while using this plugin.
Step 1: Install the plugin, go to it from your admin panel, and from the additional list, click on “Export.” This will save all your files to an export directory.
Step 2: Now, you have to import the files. For this, go back to the Admin dashboard. Navigate to the plugin option and then select “Import.” the plugin will get installed on the import side.
Step 3: In the import site, drag and drop all your export files.
Step 4: Log in to this import site and then click on the “Save” button twice to save the permalinks.
You will get redirected towards your staging website where you can start working on the development environment and keep your live website maintained for enhanced user experiences and business success.

")